Filter
66 results
20
- 10
- 15
- 20
- 25
- 30
- 50
Featured
- Featured
- Best selling
- Alphabetically, A-Z
- Alphabetically, Z-A
- Price, low to high
- Price, high to low
- Date, old to new
- Date, new to old
Sort
Sort by:
- Featured
- Best selling
- Alphabetically, A-Z
- Alphabetically, Z-A
- Price, low to high
- Price, high to low
- Date, old to new
- Date, new to old
-
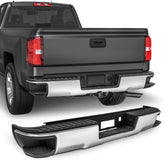
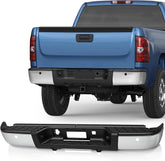
Chrome Steel Rear Bumper For 2014-2018 Chevy Silverado GMC Sierra 1500 w/o Sensor Holes, w/ Corner StepsVendor: MOSTPLUSMOSTPLUS Rear Step Bumper is compatible with the Chevy Silverado 1500 & GMC Sierra 1500 | 2014 2015 2016 2017 2018 without Parking Assist Sensor and with Corner Step Holes Models Only MOSTPLUS bumpers aren't just a stylish upgrade for your ride – they're also the first line...
- $309.99
$359.99- $309.99
- Unit price
- / per
-
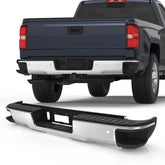
Chrome Steel Rear Bumper For 2014-2018 Chevy Silverado GMC Sierra 1500 w/Conner Steps & Parking Sensor HolesVendor: MOSTPLUSMOSTPLUS Rear Step Bumper is compatible with the Chevy Silverado 1500 & GMC Sierra 1500 | 2014 2015 2016 2017 2018 with Parking Assist Sensor and with Corner Step Holes Models Only MOSTPLUS bumpers aren't just a stylish upgrade for your ride – they're also the first line...
- $289.99
$368.99- $289.99
- Unit price
- / per
-
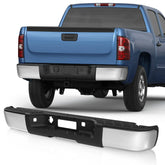
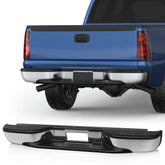
Chrome Steel Rear Bumper For 2007-2013 Chevy Silverado / GMC Sierra 1500 w/o SensorsVendor: MOSTPLUSMOSTPLUS Rear Step Bumper is compatible with the Chevy Silverado 1500 & GMC Sierra 1500 | 2007 2008 2009 2010 2011 2012 2013 without Parking Assist Sensor Models Only (2007 New Body Style Only). MOSTPLUS bumpers aren't just a stylish upgrade for your ride – they're also...
- $294.99
- $294.99
- Unit price
- / per
-
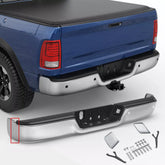
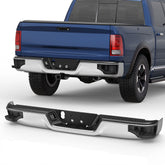
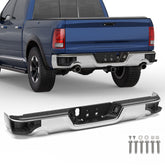
Chrome Rear Separated Bumper For 2009-2018 Dodge Ram 1500 w/ Sensor Holes w/o Dual ExhaustVendor: MOSTPLUSMOSTPLUS Rear Step Bumper is compatible with the Dodge Ram 1500 | 2009 2010 2011 2012 2013 2014 2015 2016 2017 2018, Ram 1500 Classic | 2019 2020 2021 2022 2023, Ram 2500 3500 | 2011 2012 2013 2014 2015 2016 2017 2018, with Parking Sensor...
- $279.99
- $279.99
- Unit price
- / per
-
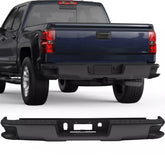
Black Rear Bumper For 2014-2018 Chevy Silverado GMC Sierra 1500 w/ Park Assist Sensor & Corner StepVendor: MOSTPLUSMOSTPLUS Rear Step Bumper is compatible with the Chevy Silverado 1500 & GMC Sierra 1500 | 2014 2015 2016 2017 2018 with Parking Assist Sensor and with Corner Step Holes Models Only MOSTPLUS bumpers aren't just a stylish upgrade for your ride – they're also the first line...
- $435.99
- $435.99
- Unit price
- / per
-
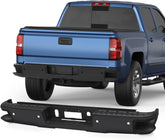
Black Steel Rear Bumper For 2014-2018 Chevy Silverado GMC Sierra 1500 w/o Sensor HolesVendor: MOSTPLUSMOSTPLUS Rear Step Bumper is compatible with the Chevy Silverado 1500 & GMC Sierra 1500 | 2014 2015 2016 2017 2018 without Parking Assist Sensor and with Corner Step Holes Models Only MOSTPLUS bumpers aren't just a stylish upgrade for your ride – they're also the first line...
- $319.99
- $319.99
- Unit price
- / per
-
Chrome Steel Rear Bumper For 1999-2007 Chevy Silverado GMC Sierra 1500 without Parking Sensor Holes GM1103122Vendor: MOSTPLUSMOSTPLUS Rear Step Bumper is compatible with the Chevy Silverado 1500 & GMC Sierra 1500 | 1999 2000 2001 2002 2003 2004 2005 2006 2007 Classic without Parking Assist Sensor Models Only MOSTPLUS bumpers aren't just a stylish upgrade for your ride – they're also the first...
- $209.99
- $209.99
- Unit price
- / per
-
Chrome Steel Rear Bumper For 2007-2013 Chevy Silverado GMC Sierra 1500 w/ Parking SensorsVendor: MOSTPLUSMOSTPLUS Rear Step Bumper is compatible with the Chevy Silverado 1500 & GMC Sierra 1500 | 2007 2008 2009 2010 2011 2012 2013 with Parking Assist Sensor Holes Models Only, 20899360, GM1103148 MOSTPLUS bumpers aren't just a stylish upgrade for your ride – they're also the first line of...
- $299.99
- $299.99
- Unit price
- / per
-
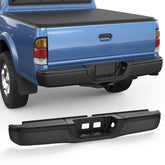
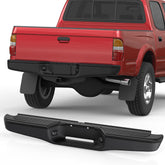
Black Rear Steel Step Bumper For 1995-2004 Toyota Tacoma 2283598201Vendor: MOSTPLUSMOSTPLUS Rear Step Bumper is compatible with Toyota Tacoma | 1995 1996 1997 1998 1999 2000 2001 2002 2003 2004 without Step-Side Models MOSTPLUS bumpers aren't just a stylish upgrade for your ride – they're also the first line of defense against rear-end collisions and backup mishaps. By enhancing...
- $183.99
- $183.99
- Unit price
- / per
-
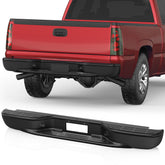
Black Rear Bumper For 1999-2007 Chevy Silverado GMC Sierra 1500 without Parking Sensor HolesVendor: MOSTPLUSMOSTPLUS Rear Step Bumper is compatible with the Chevy Silverado 1500 & GMC Sierra 1500 | 1999 2000 2001 2002 2003 2004 2005 2006 2007 Classic without Parking Assist Sensor Models Only MOSTPLUS bumpers aren't just a stylish upgrade for your ride – they're also the first...
- $204.99
- $204.99
- Unit price
- / per
-
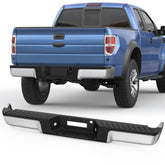
Chrome Rear Bumper Assembly For 2004-2006 Ford F-150 Styleside W/o Sensor HolesVendor: MOSTPLUSDetails: Brand: MOSTPLUS Warranty: 1 Year Fitment Type: Direct Replacement Specification: Finish: Chrome Material: Steel Interchange Part Number: FO1103117 Bumper Cut-Outs: Without Park Assist Sensor Cut-out Feature: Upgrade your vehicle with a refreshing look. Professional installation is highly recommended. Fitment: 2004-2006 F-150 Fleetside/Styleside For...
- $269.99
$388.99- $269.99
- Unit price
- / per
-
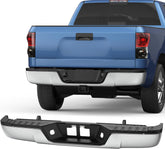
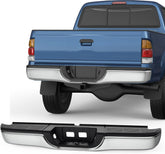
Chrome Steel Rear Bumper Assembly For 2000-2006 Toyota Tundra TO1103107Vendor: MOSTPLUSDetails: Brand: MOSTPLUS Warranty: 1 Year Color: Chrome Material: Stainless Steel, Plastic Interchange Part Number: TO1103107 Parking Aid Sensor Holes: WITHOUT Parking Aid Sensor Holes Fitment Type: Direct Replacement Placement on Vehicle: Rear Feature: Excellent Performance: The bumper could protect vehicle components and improve...
- $259.99
$309.99- $259.99
- Unit price
- / per
-
Black Steel Rear Bumper Assembly For 2000-2006 Toyota Tundra Fleetside Only TO1103108Vendor: MOSTPLUSDetails: Brand: MOSTPLUS Warranty: 1 Year Color: Black Material: Stainless Steel, Plastic Interchange Part Number: TO1103108 Fitment Type: Direct Replacement Placement on Vehicle: Rear Feature: Excellent Performance: The bumper could protect vehicle components and improve safety, under the the harsh off-road. The chrome surface...
- $239.99
- $239.99
- Unit price
- / per
-
Chrome Steel Rear Bumper Assembly For 2007-2013 Toyota Tundra w/o Park Assist or Tow Hitch TO1103117Vendor: MOSTPLUSDetails: Brand: MOSTPLUS Warranty: 1 Year Color: Chrome Material: Stainless Steel, Plastic Interchange Part Number: TO1103117 Fitment Type: Direct Replacement Placement on Vehicle: Rear Feature: Excellent Performance: The bumper could protect vehicle components and improve safety, under the the harsh off-road. The chrome surface...
- $328.99
$349.99- $328.99
- Unit price
- / per
-
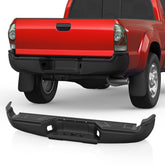
Black Rear Bumper Assembly For 2005-2015 Toyota Tacoma Fleetside StylesideVendor: MOSTPLUSDetails: Brand: MOSTPLUS Warranty: 1 Year Fitment Type: Direct Replacement Placement on Vehicle: Rear Specification: Color: Black Material: Steel Finish: Powder coated Bumper Cuts: Without parking aid sensor Cut-out Interchange Part Number: 5215104051, TO1102241 Feature: This rear bumper will provide double protection for your...
- $288.99
$299.99- $288.99
- Unit price
- / per
-
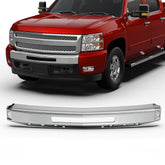
Chrome Steel Front Bumper Face Bar For 2007-2013 Chevy Silverado 1500 2007-2010 2500/3500 w/ Center Air Intake HoleVendor: MOSTPLUSDetails: Brand: MOSTPLUS Warranty: 1 Year Color: Chrome Material: Steel Replacement Number: #15941850/ #GM1002831 Fitment Type: Direct Replacement Feature: Stable characteristics, high reliability. Upgrade your vehicle with a refreshing look. Easy installation. Professional installation is highly recommended. Fitment: 2007-2013 Chevy Silverado 1500 with Center...
- $119.99
- $119.99
- Unit price
- / per
-
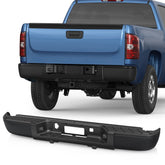
Black Steel Rear Bumper For 2007-2013 Chevy Silverado/GMC Sierra 1500 w/o Park Sensor HolesVendor: MOSTPLUSDetails: Brand: MOSTPLUS Warranty: 1 Year Color: Black Material: Steel Fitment Type: Direct Replacement Feature: Easy Installation. Requires no Modification or Drilling. Fitment: 2007-2013 Chevrolet Silverado 1500 V8 5.3L Pickup 2010-2013 Chevrolet Silverado 1500 V8 4.8L Pickup 2007-2009 Chevrolet Silverado 1500 V8 5.3L Pickup...
- $296.99
- $296.99
- Unit price
- / per
-
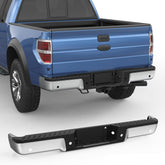
Chrome Steel Rear Bumper For 2009-2014 Ford F-150 F150 w/ Parking Sensor HolesVendor: MOSTPLUSDetails: Brand: MOSTPLUS Warranty: 1 Year Material: Steel / ABS Plastic Finish: Polished OE/OEM Part Number: 9L3Z17906A-PFM, 9L3Z17906A, 9L3Z17B807A Fitment Type: Direct Replacement Feature: Plug-n-Play Operation, Direct Bolt-on OE Fitment or Replacement for the Stock Unit. Comes with a Complete Rear Bumper Mounting Brackets...
- $329.99
- $329.99
- Unit price
- / per
-
Chrome Steel Rear Bumper Corner Step For 2009-2018 Dodge Ram 1500 2010-2012 Ram 2500 3500 without Rear Object Sensor and Dual ExhaustVendor: MOSTPLUSDetails: Brand: MOSTPLUS Warranty: 1 Year Color: Chrome Material: Steel Interchange Part Number: CH1103117 Superseded Part Number: 68049781AB-PFM, 68049781AB, 55112621AB, 68049744AA Placement on Vehicle: Rear Fitment Type: Direct Replacement Fitment: 2009-2010 Dodge Ram 1500 without Rear Object Sensor and Dual Exhaust 2010-2018 Ram 1500...
- $419.99
- $419.99
- Unit price
- / per
-
Chrome Steel Rear Bumper Corner Step For 2009-2018 Dodge Ram 1500 with Dual Exhaust without Rear Object SensorVendor: MOSTPLUSDetails: Brand: MOSTPLUS Warranty: 1 Year Color: Chrome Finish: Polished Material: Steel Placement on Vehicle: Rear Fitment Type: Direct Replacement Interchange Part Number: 68049740AB-PFM, 68049740AB, 55112621AB, 68049744AA Fitment: 2009 2010 Dodge Ram 1500 with Dual Exhaust without Rear Object Sensor 2011 2012 2013 2014...
- $419.99
- $419.99
- Unit price
- / per


