Filter
90 results
20
- 10
- 15
- 20
- 25
- 30
- 50
Featured
- Featured
- Best selling
- Alphabetically, A-Z
- Alphabetically, Z-A
- Price, low to high
- Price, high to low
- Date, old to new
- Date, new to old
Sort
Sort by:
- Featured
- Best selling
- Alphabetically, A-Z
- Alphabetically, Z-A
- Price, low to high
- Price, high to low
- Date, old to new
- Date, new to old
-
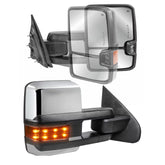
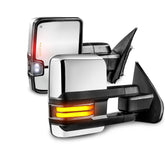
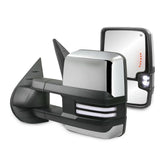
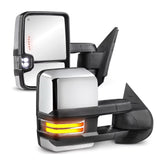
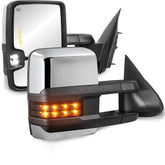
Chrome Power Fold Tow Mirrors For 2014-2018 Chevy Silverado GMC Sierra 1500 2500HD 3500HD with Turn Light, Clearance Lamp, Running LightsVendor: MOSTPLUSEnhance safety and convenience when you are towing a trailer load or camper with MOSTPLUS Towing Mirrors. Offering a wider view than standard side mirrors, these mirrors eliminate blind spots. With a direct bolt-on installation, they replace factory mirrors seamlessly. The extendable design ensures a...
- $398.99
$419.99- $398.99
- Unit price
- / per
-
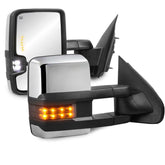
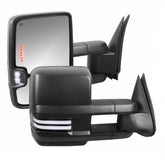
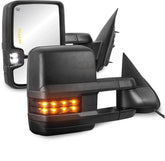
Chrome Power Heated Tow Mirror For 2015-2018 Silverado GMC Sierra 1500 2500 HD 3500 HD w/Turn SignalVendor: MOSTPLUSMOSTPLUS Towing Mirrors are designed to replace factory mirrors. They provide drivers with a full-length view of the pickup and trailer, helping prevent accidents due to a restricted field of view and ensuring that you comply with the law. Fit for 2015, 2016, 2017,...
- $205.99
- $205.99
- Unit price
- / per
-
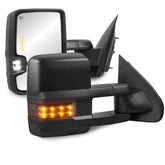
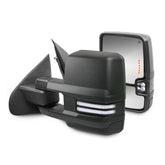
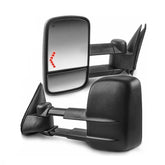
Black Power Heated Tow Mirror For 2015-2018 Chevy Silverado GMC Sierra 1500 2500HD 3500HD w/Turn SignalVendor: MOSTPLUSMOSTPLUS Towing Mirrors are designed to replace factory mirrors. They provide drivers with a full-length view of the pickup and trailer, helping prevent accidents due to a restricted field of view and ensuring that you comply with the law. Fit for 2015, 2016, 2017,...
- $198.99
- $198.99
- Unit price
- / per
-
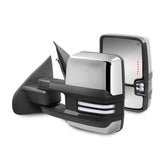
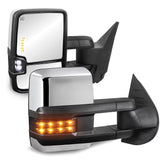
Chrome Power Heated Towing Mirrors for 2014-2018 Chevy Silverado GMC Serria 1500/2500 HD/3500 HD w/Sequential Turn Light, Clearance Lamp, White Running LightVendor: MOSTPLUSMOSTPLUS towing mirrors are designed to replace factory mirrors and will install just as the originals do. They make perfect replacements with great upgrades that have good cost savings over the dealer parts. Not only will towing mirrors help keep you, your cargo and the people...
- $235.99
- $235.99
- Unit price
- / per
-
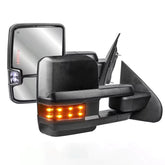
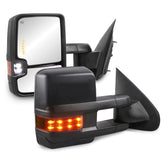
Black Power Heated Tow Mirrors For 2014-2018 Chevy Silverado GMC Serria w/Sequential Turn Light, White Running LightVendor: MOSTPLUSMOSTPLUS towing mirrors are designed to replace factory mirrors and will install just as the originals do. They make perfect replacements with great upgrades that have good cost savings over the dealer parts. Not only will towing mirrors help keep you, your cargo and the people...
- $228.99
- $228.99
- Unit price
- / per
-
Chrome Power Heated Tow Mirrors For 2014-2018 Chevy Silverado GMC Sierra w/Sequential Turn Light, Clearance Lamps, Running Light (Set of 2)Vendor: MOSTPLUSMOSTPLUS towing mirrors are designed to replace the factory mirrors and will install just as the originals do. They make perfect replacements with great upgrades that have good cost savings over the dealer parts. Not only will towing mirrors help keep you, your cargo and the...
- $218.99
$265.99- $218.99
- Unit price
- / per
-
Black Power Fold & Heated Towing Mirrors For 2007-2013 Chevy Silverado Avalanche Suburban Tahoe/ GMC Sierra Yukon with Turn Light, Clearance Lamp, Control SwitchVendor: MOSTPLUSCompatible with Chevrolet Silverado Avalanche Suburban Tahoe/GMC Sierra Yukon 2007 2008 2009 2010 2011 2012 2013, Power Folding, Heated, & Manual Extendable Towing Mirrors w/ LED Flashing Signal & Clearance Lights & w/ Control Switch SPECIFICATION: Brand: MOSTPLUS Warranty: 1 Year Color: Black Caps Power Folding...
- $389.99
- $389.99
- Unit price
- / per
-
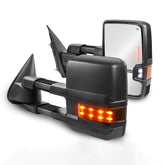
Black Power Folding Towing Mirrors For 2014-2018 Silverado Sierra 1500 2500HD 3500HD with Turn Light, Clearance Lamp, Running LightsVendor: MOSTPLUS2014 2015 2016 2017 2018 Chevrolet Silverado 1500 2500HD 3500HD/GMC Sierra 1500 2500HD 3500HD Power Folding, Heated, & Manual Extendable Towing Mirrors w/ LED Signal & Running Lights & Clearance Lights Not only will towing mirrors help keep you, your cargo, and the people...
- $389.99
$415.99- $389.99
- Unit price
- / per
-
Chrome Power Heated Tow Mirrors For 2007-2014 Chevy Silverado Tahoe, GMC Sierra Yukon with White Running LightsVendor: MOSTPLUSMOSTPLUS towing mirrors are designed to replace the factory mirrors and will install just as the originals do. They make perfect replacements with great upgrades that have good cost savings over the dealer parts. Not only will towing mirrors help keep you, your cargo and...
- $223.99
$245.99- $223.99
- Unit price
- / per
-
For 2007-2014 Chevrolet Silverado Tahoe GMC Sierra Black Power Heated Manual Extendable Tow Mirrors w/ LED Turn Signal & White Running Light & Clearance LightsVendor: MOSTPLUSEnhance safety and convenience when you are towing a trailer load or camper with MOSTPLUS Towing Mirrors. Offering a wider view than standard side mirrors, these mirrors eliminate blind spots. With a direct bolt-on installation, they replace factory mirrors seamlessly. The extendable design ensures a...
- $228.99
- $228.99
- Unit price
- / per
-
Chrome Power Heated Tow Mirrors For 2007-2013 Chevrolet Silverado GMC Sierra w/Turn Signal, Clearance LightsVendor: MOSTPLUSMOSTPLUS Towing Mirrors are designed to replace factory mirrors. They provide drivers with a full-length view of the pickup and trailer, helping prevent accidents due to a restricted field of view and ensuring that you comply with the law. Fit for 2007, 2008, 2009,...
- $193.99
- $193.99
- Unit price
- / per
-
Black Power Heated Tow Mirrors For 2007-2013 Chevy Silverado Suburban Tahoe Avalanche/GMC Sierra Yukon with Power Glass, Turn Signal Light, Backup Lamp, Manual ExtendableVendor: MOSTPLUSMOSTPLUS Towing Mirrors are designed to replace factory mirrors. They provide drivers with a full-length view of the pickup and trailer, helping prevent accidents due to a restricted field of view and ensuring that you comply with the law. Fit for 2007, 2008, 2009,...
- $191.99
- $191.99
- Unit price
- / per
-
Chrome Power Heated Tow Mirrors For 2007-2013 Chevrolet Silverado/ GMC Sierra w/ LED Sequential Turn Signal, Amber Running Light & Clearance LightsVendor: MOSTPLUSMOSTPLUS Towing Mirrors are designed to replace factory mirrors. They provide drivers with a full-length view of the pickup and trailer, helping prevent accidents due to a restricted field of view and ensuring that you comply with the law. Fit for 2007 2008 2009...
- $209.99
$259.99- $209.99
- Unit price
- / per
-
Black Power Heated Smoke Signal Tow Mirrors For 2003-2006 Chevy Silverado GMC Sierra w/ Turn Light, Clearance LampsVendor: MOSTPLUSMOSTPLUS Towing Mirrors are designed to replace factory mirrors. They provide drivers with a full-length view of the pickup and trailer, helping prevent accidents due to a restricted field of view and ensuring that you comply with the law. Fit for 2003, 2004, 2005,...
- $187.99
- $187.99
- Unit price
- / per
-
Power Heated Towing Mirrors For 2003-2006 Chevy Silverado Tahoe GMC Sierra Yukon Pair w/ Turn SignalVendor: MOSTPLUSMOSTPLUS Towing Mirrors are designed to replace factory mirrors. They provide drivers with a full-length view of the pickup and trailer, helping prevent accidents due to a restricted field of view and ensuring that you comply with the law. Fit for 2003, 2004, 2005,...
- $129.99
$149.99- $129.99
- Unit price
- / per
-
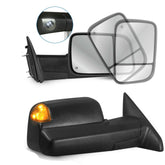
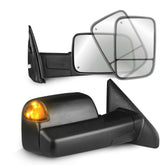
Black Power Heated Towing Mirrors For 2009-2018 Dodge Ram 1500 2010-2018 2500 3500, 2019-2023 Ram 1500 Classic With LED Turn Signal & Temp Sensor Pair(2)Vendor: MOSTPLUSEnhance safety and convenience when you are towing a trailer load or camper with MOSTPLUS Towing Mirrors. Offering a wider view than standard side mirrors, these mirrors eliminate blind spots. With a direct bolt-on installation, they replace factory mirrors seamlessly. The extendable design ensures a...
- $189.99
$259.99- $189.99
- Unit price
- / per
-
Chrome Power Heated Tow Mirrors For 1999-2007 Ford F250 F350 F450 F550 Super DutyVendor: MOSTPLUSMOSTPLUS towing mirrors are designed to replace the factory mirrors and will install just as the originals do. They make perfect replacements with great upgrades that have good cost savings over the dealer parts. Not only will towing mirrors help keep you, your cargo and the...
- $203.99
- $203.99
- Unit price
- / per
-
Chrome Power Heated Tow Mirrors For 2003-2006 Chevy Silverado Suburban Tahoe GMC Sierra Yukon w/ Turn Light, Clearance Lamps (Set of 2)Vendor: MOSTPLUSMOSTPLUS Towing Mirrors are designed to replace factory mirrors. They provide drivers with a full-length view of the pickup and trailer, helping prevent accidents due to a restricted field of view and ensuring that you comply with the law. Fit for 2003, 2004, 2005,...
- $196.99
- $196.99
- Unit price
- / per
-
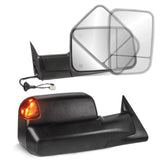
Black Power Heated Towing Mirrors for 2002-2008 Dodge Ram 1500 2003-2009 Ram 2500/3500Vendor: MOSTPLUSMOSTPLUS towing mirrors are designed to replace factory mirrors and will install just as the originals do. The manually flip design ensures a perfect, preferred view for any towing situation. Reinforced with upgraded brackets, they prevent vibration and shaking, ensuring a steady reflection. Enhance safety and...
- $183.99
- $183.99
- Unit price
- / per
-
Black Power Heated Towing Mirrors with Led Signal Lights For 1998-2001 Dodge Ram 2PCSVendor: MOSTPLUSEnhance safety and convenience when you are towing a trailer load or camper with MOSTPLUS Towing Mirrors. Offering a wider view than standard side mirrors, these mirrors eliminate blind spots. With a direct bolt-on installation, they replace factory mirrors seamlessly. The extendable design ensures a...
- $183.99
$234.99- $183.99
- Unit price
- / per


