Filter
22 results
20
- 10
- 15
- 20
- 25
- 30
- 50
Featured
- Featured
- Best selling
- Alphabetically, A-Z
- Alphabetically, Z-A
- Price, low to high
- Price, high to low
- Date, old to new
- Date, new to old
Sort
Sort by:
- Featured
- Best selling
- Alphabetically, A-Z
- Alphabetically, Z-A
- Price, low to high
- Price, high to low
- Date, old to new
- Date, new to old
-
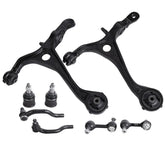
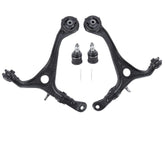
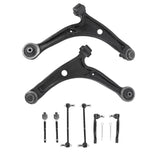
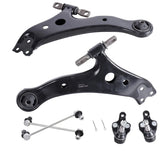
Front Lower Control Arms and Ball Joints For 04-2008 Acura TSX and 03-07 Honda AccordVendor: MOSTPLUSFeatures: Brand New High Quality, Brand New Control Arms. Made with High Strength Steel Tubing with Solid Plate Mounting Brackets for Superior Strength and Durability. The Total Length is Inspected. Perfect fit, Consistent with Your Original Size. Iron-forged Arm, the Bush is Not Easy...
- $138.15
- $138.15
- Unit price
- / per
-
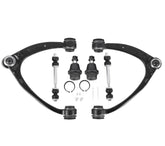
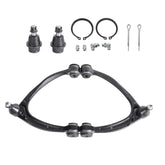
Front Upper Control Arm Lower Ball Joint For 07-15 Chevy Silverado Tahoe | GMC Sierra/Yukon | 07-14 Cadillac Escalade ESV/EXTVendor: MOSTPLUSFeatures: Brand New High Quality, Brand New Control Arms. Made with High Strength Steel Tubing with Solid Plate Mounting Brackets for Superior Strength and Durability. The Total Length is Inspected. Perfect fit, Consistent with Your Original Size. Iron-forged Arm, the Bush is Not Easy...
- $95.61
- $95.61
- Unit price
- / per
-
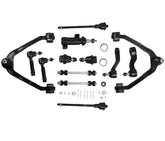
Front Upper Control Arms For 2002-2006 Escalade/ESV/EXT & 99-06 Chevy Silverado 1500/Suburban/Avalanche/Tahoe & 99-06 GMC Sierra 1500/YukonVendor: MOSTPLUSFeature: The control arms are built using advanced processes and premium coatings, to maximize their durability and corrosion resistance. Highly precise engineering, precision-machined forged, to make sure assemble hole, bushings insert, and installation sizes are proper. Improve ride comfort: Pre-installed rubber bushings effectively help...
- $135.99
$156.10- $135.99
- Unit price
- / per
-
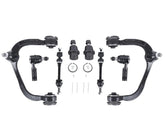
Front Upper Control Arms Ball Joints For 05-08 Ford F-150 & 06-08 Lincoln Mark LTVendor: MOSTPLUSFeatures Brand New High Quality, Brand New Control Arms. Made with High Strength Steel Tubing with Solid Plate Mounting Brackets for Superior Strength and Durability. The Total Length is Inspected. Perfect fit, Consistent with Your Original Size. Iron-forged Arm, the Bush is Not Easy...
- $116.54
- $116.54
- Unit price
- / per
-
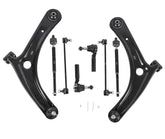
Front Lower Control Arms and Ball Joints For 07-17 Jeep Patriot/Compass & 07-12 Dodge CaliberVendor: MOSTPLUSFeatures: Brand New High Quality, Brand New Control Arms. Made with High Strength Steel Tubing with Solid Plate Mounting Brackets for Superior Strength and Durability. The Total Length is Inspected. Perfect fit, Consistent with Your Original Size. Iron-forged Arm, the Bush is Not Easy...
- $92.94
- $92.94
- Unit price
- / per
-
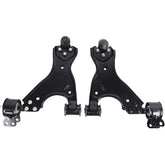
Front Lower Control Arm For 2007-2015 Buick Enclave & Chevy Traverse & GMC Acadia & Saturn OutlookVendor: MOSTPLUSFeatures: High Quality Steel Material, Improve the Feeling of Riding. Flexible & Stable Ball Joints, Avoid Tilt of the Car When Turning. Hot-Bonded Construction Bushings, Reduce Noise & Vibration Effectively. High Rubber, High Level Bonding Adhesiver is Used for Durability. Heat Treatment Hardness, With...
- $124.37
- $124.37
- Unit price
- / per
-
Front Lower Control Arms Ball Joints For 04-08 Acura TSX & 03-07 Honda Accord 4PCSVendor: MOSTPLUSFeatures: Brand New High Quality, Brand New Control Arms. Made with High Strength Steel Tubing with Solid Plate Mounting Brackets for Superior Strength and Durability. The Total Length is Inspected. Perfect fit, Consistent with Your Original Size. Iron-forged Arm, the Bush is Not Easy...
- $116.53
- $116.53
- Unit price
- / per
-
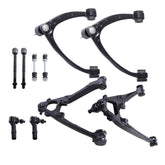
Front Upper Control Arms and Lower Ball Joints For 2007-2014 Chevry Silverado 1500/Tahoe & GMC Sierra 1500/Yukon & Cadillac EscaladeVendor: MOSTPLUSFeatures: Brand New High Quality, Brand New Control Arms. Made with High Strength Steel Tubing with Solid Plate Mounting Brackets for Superior Strength and Durability. The Total Length is Inspected. Perfect fit, Consistent with Your Original Size. Iron-forged Arm, the Bush is Not Easy...
- $91.09
- $91.09
- Unit price
- / per
-
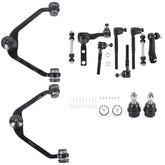
Front Upper Control Arms and Ball Joints For 1997-2003 Ford F-150/F-250 & 1998-2002 Lincoln NavigatorVendor: MOSTPLUSFeatures: Brand New High Quality, Brand New Control Arms. Made with High Strength Steel Tubing with Solid Plate Mounting Brackets for Superior Strength and Durability. The Total Length is Inspected. Perfect fit, Consistent with Your Original Size. Iron-forged Arm, the Bush is Not Easy...
- $91.72
- $91.72
- Unit price
- / per
-
Front Upper Control Arms Lower and Ball Joints For 1997-2004 Ford F-150/Expedition &1997 F-250 & 1998-2002 Lincoln Navigator (2WD ONLY)Vendor: MOSTPLUSSpecification: Material: Metal and Plastic Quantity: 4 Pieces Surface Finish: Polished, Rust Protected Part Type: Ball Joint Assembly Note: FOR 2WD ONLY Location: Front Lower Suspension, Left and Right Wheels Reference OE Number: K8726; K8728; K8695; 101M48210E Function: Contribute to the handling and braking...
- $94.99
- $94.99
- Unit price
- / per
-
Front Upper Lower Control Arm Ball Joints For 03-07 Honda Accord & 04-08 Acura TSXVendor: MOSTPLUSFeatures: Brand New High Quality, Brand New Control Arms. Made with High Strength Steel Tubing with Solid Plate Mounting Brackets for Superior Strength and Durability. The Total Length is Inspected. Perfect fit, Consistent with Your Original Size. Iron-forged Arm, the Bush is Not Easy...
- $173.27
- $173.27
- Unit price
- / per
-
Front Left Right Control Arms and Ball Joints For 2004-2008 Ford F-150 & 2006-2008 Lincoln Mark LTVendor: MOSTPLUSFeatures: Brand New High Quality, Brand New Control Arms. Made with High Strength Steel Tubing with Solid Plate Mounting Brackets for Superior Strength and Durability. The Total Length is Inspected. Perfect fit, Consistent with Your Original Size. Iron-forged Arm, the Bush is Not Easy...
- $93.11
- $93.11
- Unit price
- / per
-
Front Lower Control Arms & Ball Joints Kit For 2001-2005 Acura MDX & 2003-2005 Honda PilotVendor: MOSTPLUSFeatures: Brand New High Quality, Brand New Control Arms. Made with High Strength Steel Tubing with Solid Plate Mounting Brackets for Superior Strength and Durability. The Total Length is Inspected. Perfect fit, Consistent with Your Original Size. Iron-forged Arm, the Bush is Not Easy...
- $137.89
- $137.89
- Unit price
- / per
-
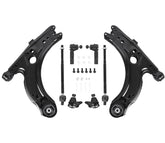
Front Left+Right Lower Control Arm and Ball Joints For 1998-2010 VW Golf/Beetle/JettaVendor: MOSTPLUSFeatures: Brand New High Quality, Brand New Control Arms. Made with High Strength Steel Tubing with Solid Plate Mounting Brackets for Superior Strength and Durability. The Total Length is Inspected. Perfect fit, Consistent with Your Original Size. Iron-forged Arm, the Bush is Not Easy...
- $102.32
- $102.32
- Unit price
- / per
-
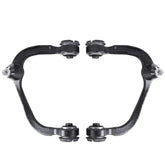
Left & Right Front Upper Control Arms For 2005-2014 Ford F-150/Expedition & Lincoln Mark LT/NavigatorVendor: MOSTPLUSFeatures: Complete Assembly: Brand new suspension control Arm & Ball Joints Assembly,All parts are pre-assembled for a trouble-free installation. Well Made And Durable: Made with high strength steel tubing with solid plate mounting brackets for superior strength and durability. Surface Finish: Polished, rust protected; anti-corrosion coating on...
- $87.14
- $87.14
- Unit price
- / per
-
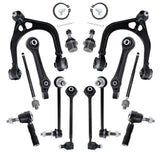
Front Control Arm Suspension For 05-10 Chrysler 300 & 06-10 Dodge Challenger/Charge RWD/2WDVendor: MOSTPLUSFeatures: Brand New High Quality, Brand New Control Arms. Made with High Strength Steel Tubing with Solid Plate Mounting Brackets for Superior Strength and Durability. The Total Length is Inspected. Perfect fit, Consistent with Your Original Size. Iron-forged Arm, the Bush is Not Easy...
- $190.99
$206.63- $190.99
- Unit price
- / per
-
Front Lower Control Arm Ball Joint For 02-08 Toyota Camry/Highlander/Solara & 02-08 Lexus ES300/ES330/RX330/RX350/RX400hVendor: MOSTPLUSFeatures: Brand New High Quality, Brand New Control Arms. Made with High Strength Steel Tubing with Solid Plate Mounting Brackets for Superior Strength and Durability. The Total Length is Inspected. Perfect fit, Consistent with Your Original Size. Iron-forged Arm, the Bush is Not Easy...
- $93.57
- $93.57
- Unit price
- / per
-
Front Upper Control Pitman Idler Arm For 1997-2003 Ford Expedition/F-150/F-250 & 1998-2002 Lincoln Blackwood/NavigatorVendor: MOSTPLUSFeatures: Brand New High Quality, Brand New Control Arms. Made with High Strength Steel Tubing with Solid Plate Mounting Brackets for Superior Strength and Durability. The Total Length is Inspected. Perfect fit, Consistent with Your Original Size. Iron-forged Arm, the Bush is Not Easy...
- $151.22
- $151.22
- Unit price
- / per
-
Front Upper Lower Control Arms For 2007-2013 Chevy Silverado 1500/ Tahoe & GMC Sierra 1500/Yukon & Cadillac EscaladeVendor: MOSTPLUSFeatures: Brand New High Quality, Brand New Control Arms. Made with High Strength Steel Tubing with Solid Plate Mounting Brackets for Superior Strength and Durability. The Total Length is Inspected. Perfect fit, Consistent with Your Original Size. Iron-forged Arm, the Bush is Not Easy...
- $341.63
- $341.63
- Unit price
- / per
-
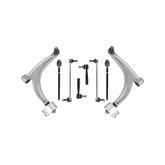
Front Lower Control Arms w/ Ball Joints For 2004-2012 Chevy Malibu & Pontiac G6 & Saturn AuraVendor: MOSTPLUSFeature: High quality, brand new control arms Made with high strength aluminum tubing with solid plate mounting brackets for superior strength and durability. The total length is inspected, perfect fit, consistent with your original size. Aluminum-forged arm, the bush is not easy to take...
- $142.85
- $142.85
- Unit price
- / per
