Filter
6 results
20
- 10
- 15
- 20
- 25
- 30
- 50
Best selling
- Featured
- Best selling
- Alphabetically, A-Z
- Alphabetically, Z-A
- Price, low to high
- Price, high to low
- Date, old to new
- Date, new to old
Sort
Sort by:
- Featured
- Best selling
- Alphabetically, A-Z
- Alphabetically, Z-A
- Price, low to high
- Price, high to low
- Date, old to new
- Date, new to old
-
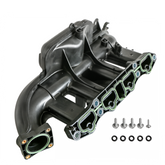
Engine Intake Manifold For Chevy Cruze Sonic Trax Buick Encore 1.4L L4 615-380Vendor: MOSTPLUSDetails Brand: MOSTPLUS Warranty: 1 Year Specifications Condition: brand new after market Interchange Part Number: 55581014, 25299449, 55577314, 615-380 Fuction: Evenly distributes the combustion mixture (or just air in a direct injection system) to each intake port in the cylinder head for proper function...
- $70.99
- $70.99
- Unit price
- / per
-
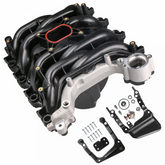
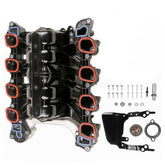
Intake Manifold w/ Gaskets Set For Ford Crown Victoria Explorer Mustang 4.6L V8Vendor: MOSTPLUSDetails Brand: MOSTPLUS Warranty: 1 Year Color: Black Features 100% brand new Interchange Part Number: 1L2Z9424FA, 1W7Z9424AB, 3W7Z9424AA, 3W7Z9424AD, 3W7Z9424AE, 6W7Z9424AA, 615-175 Fitment Make Model Year Engine Body Style Position Ford Crown Victoria 2001-2011 V8 4.6L All Body Type Upper Ford Mustang 1999-2004 V8 4.6L All Body Type Upper Ford Explorer 2002-2002...
- $168.99
- $168.99
- Unit price
- / per
-
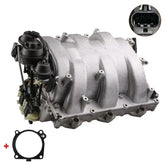
Intake Engine Manifold Assembly for Mercedes Benz C230 C250 E350 SLK 280 SLK 300Vendor: MOSTPLUSDetails Brand: MOSTPLUS Warranty: 1 Year Features Condition: 100% brand new Interchange Part Number: A2721402401, 2721402101, 2721402201, 2721402401 FitmentFit for MERCEDES C 230 2006 MERCEDES C 230 4MATIC SEDAN 2008, 2009, 2010, 2011 MERCEDES C 230 RWD SEDAN 2008, 2009, 2010, 2011 MERCEDES C...
- $268.99
- $268.99
- Unit price
- / per
-
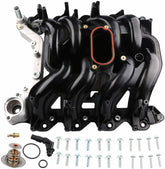
Upper Intake Manifold w/ Gasket Kit For Ford E150 E250 E350 E450 5.4L V8 615-188Vendor: MOSTPLUSDetails Brand: MOSTPLUS Warranty: 1 Year Color: Black Features 100% brand new Including Complete improved intake manifold with new aluminum crossover, new thermostat, o-ring, and screws Professional Installation is Highly Recommended Interchange Part Number: 615-188, 9C2Z9424AA, AC2Z9424A,4C2Z9424CA, 5C2Z9424AA Fitment For 03-14 Ford E-150 5.4L...
- $159.99
- $159.99
- Unit price
- / per
-
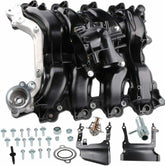
Upper Engine Intake Manifold w/ Gasket For Ford E-150 E250 F-150 4.6LVendor: MOSTPLUSDetails Brand: MOSTPLUS Warranty: 1 Year Color: Black Features 100% brand new Interchange Part Number: 7L3Z-9424-F,615-375,329-135 One piece design Reinforced aluminum coolant crossover - eliminates failure due to corrosion or vibration Re-engineered reinforced plastic Intake gaskets molded into the intake manifold Fits the following...
- $171.99
- $171.99
- Unit price
- / per
-
Upper Intake Manifold w/ Gasket For Ford F150 E-150 E-250 Lobo 4.6L 9L3Z9424EVendor: MOSTPLUSDetails Brand: MOSTPLUS Warranty: 1 Year Features 100% brand new Including Complete improved intake manifold with Gaskets, Hardware and Thermostat Interchange Part Number: 9L3Z9424E,615-376 Fitment For 2010-2014 Ford E-150 For 2010-2014 Ford E-250 For 2009-2010 Ford F-150 For 2009-2010 Ford Lobo NOTE Built as...
- $169.99
- $169.99
- Unit price
- / per
