Power folding heated towing mirrors installation for 2014 - 2018 Silverado/Sierra
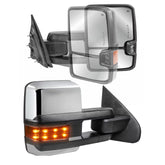
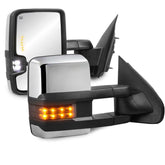
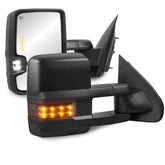
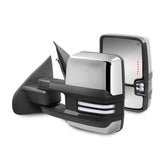
Have you recently bought a new RV or are you planning to tow your boat to the beach? When you need to tow a 30-foot trailer or boat, your original small standard mirror is no longer suitable for your application. At this time, you need to replace a set of aftermarket towing mirrors. Choose MOSTPLUS power folding heated towing mirrors to make your towing worry-free.
Many customers do not know how to install our products after buying them. For this reason, our experts have specially written this guide to help everyone upgrade their towing mirrors better and faster. The towing mirror installation guide introduced in this article applies to Silverado/Sierra from 2014 to 2018.
Confirm the functions of the side mirror
Before buying a new side mirror, we need to confirm which options are equipped for our car. The side mirror we are going to replace today is electric folding, and has turn signals on the mirror, puddle lights under the car, and has heating function. Then choose the product with the functions on your car. Our towing mirror does not have puddle lights, but it has all other functions, so we still replaced it.

Check the package
The first thing you need to do after receiving the package is to unpack it, take out everything, and check if there is any damage. This towing mirror has turn signals, width lights, electric folding and heating functions, and can be used normally in winter. In addition, there are 8-10 nuts, an installation drawing, and a set of plug-in wiring.

Preparation before installation
Before you start installing, you also need to prepare some installation tools.
- Power tools and fasteners: electric drill (set the appropriate torque to prevent damage to plastic parts), 10 mm and 7 mm deep sockets, quarter-inch drive extension rod.
- Electrical tools: insulation tape, heat shrink tubing, wire strippers, welding tools (solder and soldering iron), wire cutters, etc.
- Disassembly tools: door trim panel removal tool, plastic or metal screwdriver (if using metal tools, remember to wrap them with tape to avoid scratches).
- Other auxiliary tools: flat head screwdriver, magnetic tool, 5/16 inch drill bit, a small tool with a hook.

Disconnect the Battery
Now that we have everything ready, let's get started. The first thing we need to do is disconnect the battery in case of a circuit malfunction or accidental short. Open the hood of the front car, find the power source, and disconnect it with a wrench.

Removing the original side mirrors
We have disconnected all the batteries, now we move on to removing the door trim panels.
Open the access cover
There is an access cover under the door handle and near the window switch that you need to remove. Take your pick and find a small indentation in the access cover, you can just put the pick under it and lift it to loosen it.

Remove the door trim panel bolts
Next, we took out the body tool and removed the 7mm bolts in the door trim panel, there are six in total. One is just behind the door handle, two are in the handle pocket above the speaker, one is deep in the door panel, and two are at the bottom of the door.

Remove the door trim panel
Then we will take the screwdriver and pry along the outer edge of the door until you can remove the entire trim panel.
Note: When you get to the top of the trim panel firmly pull straight out. The clips hold on very tightly but will pull off of the panel with firm tension.
When you get to the top of the door trim panel firmly pull it straight out. The clips hold on very tightly but will pull it off of the panel with firm tension.

Unplug the handle cable
Next, we will disconnect the handle cable. We just press the lever on the cable, push it forward a little bit, lift it, pull it out to the side, and then you'll see the little ball attached here, turn it, and then pull the ball out.

Disconnect the mirror switch
Disconnect your mirror switch, there's a little button on top here, you just push it down and pull it down. Disconnect the main harness, there's a little red switch here, pull it down. There's a little black tab right in the center of this gray button bar, push the tab down, pull the bar down and it will disconnect.

Remove the upper door trim
The next step is to go ahead and remove the upper door trim. There's a little body plug here, twist the little body plug and then pull it out, you can see as it's pulled out, the edge will roll up and you have to roll it up and down and it will pull off. Then, you also have to pull out the other body plug. So just take that out, twist, and pull at the same time, and it will pull off.

Loosen the nuts on the mirror
Now that we've disconnected all the wires, go ahead and grab the mirror. Loosen the three nuts on the mirror. Since this is a half-ton vehicle, there are only three. If you had a trailer mirror before, you'll have another hole. If you're just replacing it because one broke, you don't need to drill a fourth hole. We're then going to put this snake clamp and snake wire through that hole. Go to the side of the mirror and wiggle it a little bit and then pull the whole mirror out. Now your wire removal steps are complete.

Installing New Towing Mirrors
Drilling the Fourth Hole (Optional)
The next thing we are going to do is install the aftermarket towing mirror. You will see a little circle through which you will need to drill the fourth hole to secure the new towing mirror. To prevent the metal from rusting, get yourself some self-etching primer and apply it to that piece of bare metal.

Installing the New Towing Mirror
Carefully thread the cable for the new towing mirror through the cable hole in the door. Then, place the rubber washer into the wiring hole and pull it through, aligning the mirror as best as possible. Push it in a little, then reach over and place at least a few ten millimeter nuts on the studs, first manually securing the towing mirror with a few nuts, and finally, we use a manual wrench and continue to tighten them all.
Note: The towing mirror comes with a rubber guard, remember to install the rubber guard in place when the cable is passed through the door to ensure that the cable is not damaged by friction.

Wiring Up
Getting the Speakers Out
The next thing we're going to do is connect the floodlights and clearance lights on the back of the mirrors. To make this a little easier, the first thing we're going to do is get the speakers out. You can remove the wire retainer, pull up the safety clip, press the button, and disconnect the speaker. This will give us easy access to the wiring harness inside the door, and it will make it easier to do the wiring. Finally, we push the plugs through the holes and pull them out of the speaker holes.

Disconnect the wiring from the door
What we're going to do next is take the wiring from the door and then undo the grommet on the door. We're going to push it through the door and into the speaker hole.

Now let's go ahead and press down on the top of it and you can pop that little seal out. You can see there's a little plastic hook in there. You'll see this purple latch that you can pry open with a trim tool and it'll come loose. Next, we move that grommet through the door casing and reach through the speaker hole and just give it a pinch and you can get it in there.

We removed the sheathing ran the wire through where the grommet was and then we removed all the tape on both sides. The only thing we're going to do is we're going to cut in the back of this grommet, otherwise, it's going to be hard to get the wire through.

Cable Connection
The next step is to install the wires. The cable connections are as follows:
- White wire: controls the cargo light
- Blue wire: controls the obstacle clearance light
- Black wire: ground wire
- Orange wire: connects to the turn signal in the side mirror

Next, what we're going to do is we're going to take the blue wire and the white wire and we're going to pull the wires through the grommet until we have about 6 to 8 inches of wire left, but it can be longer. We have the other plugs on this side, and then the black and orange wires (yours will probably be red).

Then we take the blue wire and the white wire and loop it around the sheath and the grommet on the other side and we're going to pull it through the grommet. If you take the bracket out, it makes it easier to pull the wire through. We take out a steel wire that has a little hook on the end of it. We put a little loop on the end of the wire hook it to the loop on the steel wire and finally pull it through.

We tape the blue wire and the white wire down. And then we start to wire it up. We put the wire through the latch, and once we put it in, we cut the length of both wires, usually a little bit down to the actual terminal itself. And then we strip the ends of both wires, about a quarter inch or so - 3/8 inch or so, and then we put the terminal on the end. And then we set them up and put the terminal into the terminal clamp.

The clamps are numbered, and the blue one is at position 1, it is the fifth position from the end.

Before we do that, we need to push the latch in on one end of the clamp, you'll hear a click, and then it will pop out of the other end (which we call the GM end).

We're going to take the terminal of the blue wire, which has the shank on one side and the flat side, and take the flat side of the terminal and have it facing the GM end. Once that's correct, we're going to put it into position 11. The white wire is going to go into position 9.

Once we put them back in, we just go ahead and click the latch and hear it click. And then we go ahead and zip tie it shut and we're ready to install it back onto the hinge post there.
We put the little bracket back on first, sliding it in, and then folding the rubber grommet back in. Lastly, we slide the hinge post wires back into the door.

We move on to the next step and tape down the blue and white wires before putting the washers back into the holes and mounting the speaker.

Next, we are going to use the yellow tracer for the red wire and the white tracer for the black wire. Take the small male plug (4-pin plug) that comes off the 18-pin plug and cut the black wire with the side cutters also cut the red wire as close to the 4-pin plug as possible because we are going to connect them to the auxiliary plug through these two wires.

We took out the auxiliary plug again trimmed it down, maybe four inches or so, and cleaned up the end of the wire.

Then take the two wires you just cut from the 18-pin plug and connect the black wire to the white wire together and the red wire to the yellow wire and solder them together.

Finally, we are left with these: the auxiliary plugs (white and blue) plug into the door, and the black and white, red and yellow plug into the 18-pin plug.

Since this 4-pin male plug coming out of the 18-pin plug (taken from the mirror) is no longer used, we removed these two wires.

Next, you just plug the remaining 4-pin male plug into the 4-pin female plug. Make sure the colored wires line up. You can see there's a latch on the side and then you just plug it in, making sure it's tight.

Then plug the 18-pin connector on the mirror into the door and you’re done.
Functional testing
The next thing we're going to do is temporarily connect our door trim, just plug in the wires, and make sure everything works before we put everything back together permanently. Let's test all of its functions power fold, cargo bay lights, clearance lights, etc., and see how it performs.
Reinstall the door trim panel
After confirming that everything is functioning properly, reinstall the door trim back into place. Make sure all clips are firmly in place and finally tighten all screws. Don't forget to connect the battery to complete all electrical operations.
Conclusion
The installation steps of the towing mirror may seem complicated, but as long as you follow the above steps carefully, you can complete it at home even without professional experience. After the installation is completed, your car will be better able to cope with the needs of trailer driving and ensure driving safety.
If you have any questions during the installation process, please leave a message in the comment area and I will try my best to help answer them. I hope this guide is helpful to you and wish you a happy life!
Featured Products
- $398.99
$419.99- $398.99
- Unit price
- / per
- $205.99
- $205.99
- Unit price
- / per
- $198.99
- $198.99
- Unit price
- / per
- $235.99
- $235.99
- Unit price
- / per
