Filter
4 results
20
- 10
- 15
- 20
- 25
- 30
- 50
Best selling
- Featured
- Best selling
- Alphabetically, A-Z
- Alphabetically, Z-A
- Price, low to high
- Price, high to low
- Date, old to new
- Date, new to old
Sort
Sort by:
- Featured
- Best selling
- Alphabetically, A-Z
- Alphabetically, Z-A
- Price, low to high
- Price, high to low
- Date, old to new
- Date, new to old
-
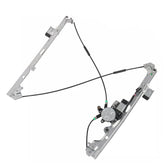
Front Passenger Side Power Window Regulator w/ Motor For Chevy Suburban GMC SierraVendor: MOSTPLUSDetails: Brand: MOSTPLUS Warranty: 1 Year Material: Metal and Plastic Operation: Power Electric/Manual: Electric Placement: Front, Right Attachment Type: Bolt-On Motor Included: Yes OE #: 15077854 Dorman #: 741-645 Fitment: 2002-2006 Cadillac Escalade (Base & EXT Model) Front Right with Motor 2002-2006 Chevrolet Avalanche...
- $49.99
- $49.99
- Unit price
- / per
-
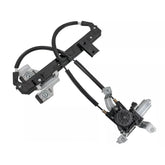
Rear Passenger Side Power Window Regulator w/ Motor For GMC Yukon Chevy TahoeVendor: MOSTPLUSDetails: Brand: MOSTPLUS Warranty: 1 Year Electric/Manual: Electric Motor Includes: With Motor Placement on Vehicle: Right, Rear Interchange Part Number: 748-229, 15135973, 19260051, 15071222, 15077725, 15177007, 15193042, 15206915, 15757404 Fitment: 2002-2006 Cadillac Escalade Rear Right with Motor 2001-2006 Chevy Tahoe Rear Right with Motor...
- $49.99
- $49.99
- Unit price
- / per
-
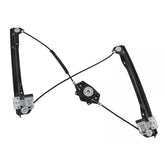
Front Right Window Regulator w/o Motor For 2007-2012 Ford Fusion Lincoln MKZVendor: MOSTPLUSDetails: Brand: MOSTPLUS Warranty: 1 Year Motor Included: No Attachment Type: Bolt On Electric/Manual: Electric Material: Metal and Plastic Fitment Type: Direct Replacement Interchange part number: 740-141, 8E5Z5423200A, 6E5Z5423200AB, TYC660343 Fitment: 2006-2012 Ford Fusion 2007-2012 Lincoln MKZ 2006 Lincoln Zephyr 2006-2011 Mercury Milan Package...
- $59.99
- $59.99
- Unit price
- / per
-
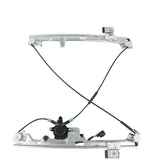
Left/Driver Side Power Window Regulator Motor For Chevry Tahoe GMC Sierra YukonVendor: MOSTPLUSSpecification · Item Type: Power Electric Window Regulator · Condition: Brand New · Warranty: One Year Warranty · OE Number: 15077853, 15095843, 15101785, 15755431, 15765393, 19120846, 19179943, 20914717, 741-644 · Quantity Sold: One Piece Fitment: CADILLAC: For 2002-2006 Cadillac Escalade ·Front Driver Side For 2002-2006 Cadillac Escalade...
- $39.99
$42.99- $39.99
- Unit price
- / per
